Introduction
Depict High and Low Level Airways, NAVaids, Waypoints and Holding Patterns on the Map
In this topic, you learn how to display information for high and low airways, navaids, holding patterns, and waypoints on the N-Tracking map.
We estimate that this will take 5 minutes to complete.
Adding Navigational Information to N-Tracking Maps
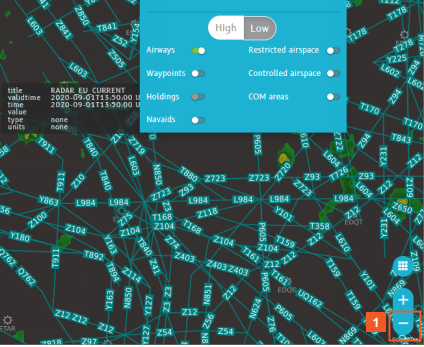
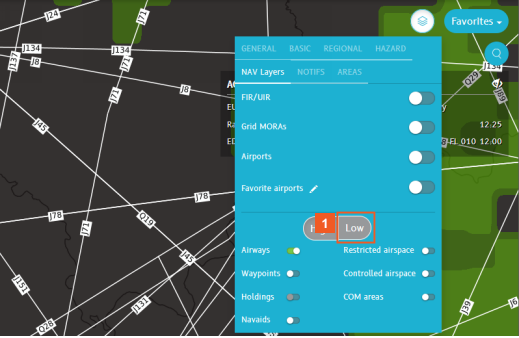
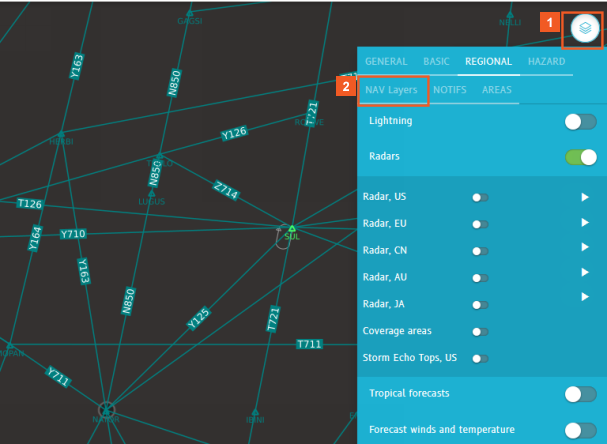
Use the options on the lower half of the NAV Layers pane to display on the map either high and low:
- Airways
- Waypoints
- Holding patterns
- Navaids.
You can use the High and Low level buttons to switch between the two levels, to match the flight level for which you want to plan.
![]()

For detailed information on working with the last three NAV layers listed on the pane, consult the topic Display Restricted Airspaces, Controlled Airspaces, or Communication Areas.
Detailed explanation
Let's get oriented: the map is focused on the southern United Kingdom and the countries just across the English Channel.
The map zoom level is at 100 nm and the NAV Layers Airports option is enabled, so round, gear-like gray and cyan airport symbols display on the map.
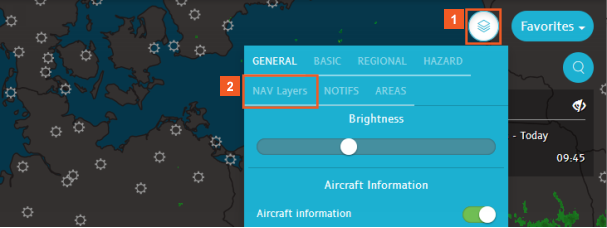
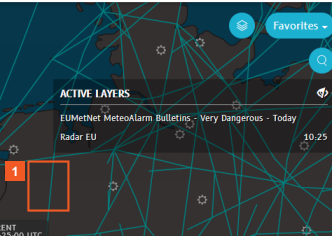
![]() Click the Layers button.
Click the Layers button.
The cyan airport symbols represent airports you have set up as "favorites".
Do you know what the difference is between a gray and a cyan colored airport symbol?
If you have reviewed topic, Display FIRs, UIRs, Airports, and Favorite Airports, you should know.
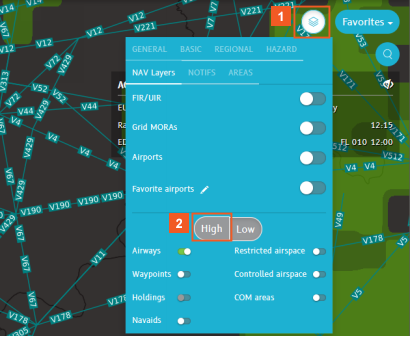
![]() Click the NAV Layers tab.
Click the NAV Layers tab.
For this example, at the 100 km zoom level, none of the sliders are accessible (they're "grayed out").
You cannot use them.
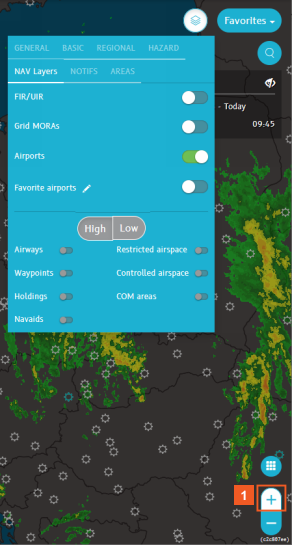
![]() Click the Zoom in (+) button.
Click the Zoom in (+) button.
HINT
You can also use your mouse scroll wheel (or its equivalent) to zoom in on the map.
For this example, at the 50 km zoom level, some, but not all of the lower sliders become accessible.
You can define the zoom level at which you want the different navigational information layers to be available for use in your zoom settings in the User Settings menu. For more details, review the topic, Adjust Default Zoom Levels for Navigational Layers.
HINT
For users whose map scale is in kilometers, the same applies at 50 km.
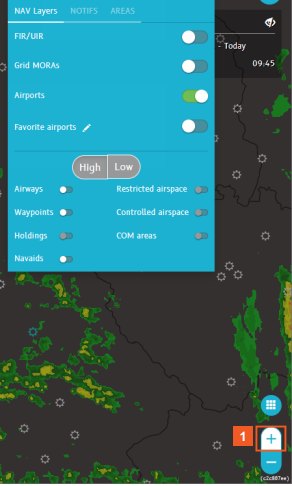
![]() Click the Zoom in (+) button.
Click the Zoom in (+) button.
At the 20 nm zoom level, the airport IATA codes automatically display.
To continue your review of using the navigational layers, enable the Airways slider. For this example, the Low option is active and low level Airways will display.
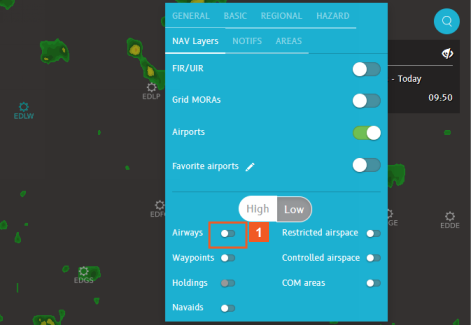
![]() Click the Airways slider.
Click the Airways slider.
Airways are automatically labeled at the 20 nm zoom level. At other zoom levels, you must click a specific airway to view its identifier in the NAV pane.
ATTENTION
Low-level Airways display in cyan, as shown in this example. High-level Airways display in white. You cannot display both levels of Airways simultaneously.
![]() Click the Zoom out (-) button.
Click the Zoom out (-) button.
At the 50 nm zoom level, cyan-colored lines represent all the low-level Airways, but those Airways are not labeled.
For more details, you must click a specific airway.
HINT
If you use the zoom control to change the visible map area, zooming may cause the Airways to drop from the display again.
Instead of zooming in, we recommend that you click and drag (pan) to reposition the map. This allows you to display the Airways in the area you want to investigate.
![]() Click the highlighted cyan line.
Click the highlighted cyan line.
HINT
If you use the zoom control to change the visible map area, zooming may cause the Airways to drop from the display again.
Instead of zooming in, we recommend that you click and drag (pan) to reposition the map. This allows you to display the Airways in the area you want to investigate.
You can see the airway name in the NAV pane.
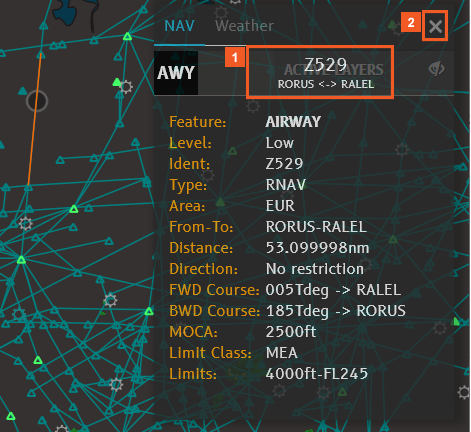
![]() Click Z529.
Click Z529.
Interpret the symbols between the airway endpoints as follows:![]() In this example, the symbols indicate there are no restrictions on flight direction. Either a forward or backward course between Navaids is acceptable.
In this example, the symbols indicate there are no restrictions on flight direction. Either a forward or backward course between Navaids is acceptable.![]() This indicates a one-way, forward course to the navaid.
This indicates a one-way, forward course to the navaid.![]() This indicates a one-way, backward course to the navaid.
This indicates a one-way, backward course to the navaid.
Detailed information about the airway displays in the NAV pane.
After you select a specific airway, it's highlighted in orange. This is particularly helpful when you click an airway near a point where multiple Airways intersect.
![]() Click the Close (X) button.
Click the Close (X) button.
Back at the 20 nm zoom level, switch to viewing high-level Airways on the map to see the difference.
You can switch between displaying high or low-level Airways (and Navaids and Waypoints) whenever you like, but you cannot view information for both high and low-levels simultaneously.
![]() Click the Layers button.
Click the Layers button.
The NAV Layers tab is already selected.
![]() Click the High button.
Click the High button.

HINT
In your operational environment, click anywhere on the map to hide the Layers menu pane.
High-level Airways display in white. You can work with them in exactly the same manner as you did with low-level Airways.
With the Layers pane open again and the NAV Layers tab active, change the display back to low-level navigational elements.
![]() Click the Low button.
Click the Low button.
Now add Waypoints and Navaids to the display.
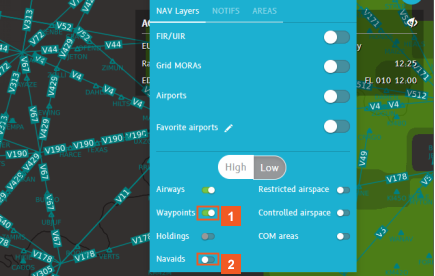
![]() Click the Waypoints slider.
Click the Waypoints slider.
![]() Click the Navaids slider.
Click the Navaids slider.
Zoom in to 5 nm.
![]() Click the Zoom in (+) button.
Click the Zoom in (+) button.
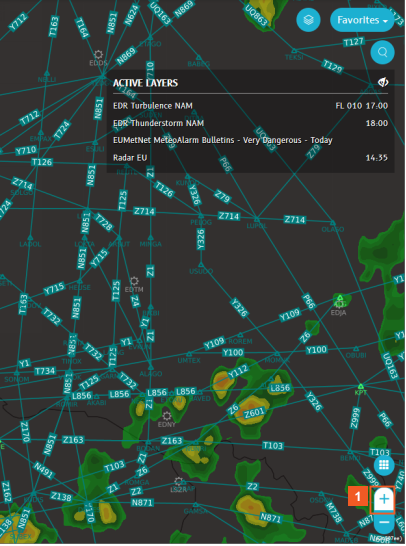
![]() Click the Zoom in (+) button.
Click the Zoom in (+) button.
![]() Click the Layers button.
Click the Layers button.
![]() Click the NAV Layers tab.
Click the NAV Layers tab.
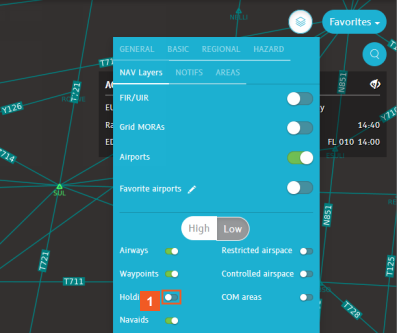
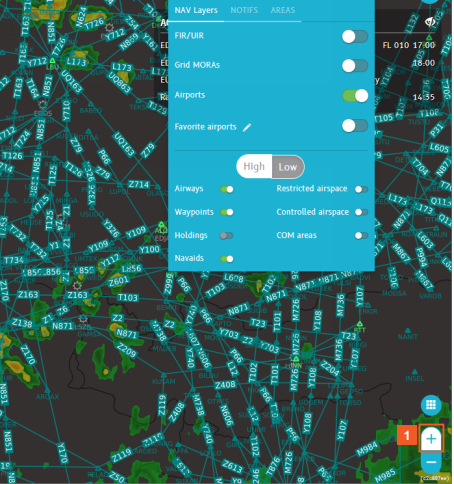
![]() Click the Holdings slider.
Click the Holdings slider.
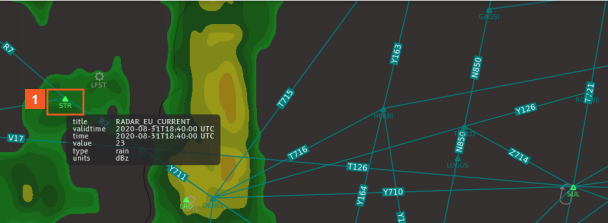
![]() A hollow triangle represents a non-compulsory Waypoint or Navaid.
A hollow triangle represents a non-compulsory Waypoint or Navaid.
![]() A solid triangle represents a compulsory Waypoint or Navaid.
A solid triangle represents a compulsory Waypoint or Navaid.
Low-level Waypoints are depicted in teal, while high-level Waypoints (not shown here) are depicted in black.
Navaids display in green.
HINT
To view waypoint latitude and longitude, click the symbol and view the information displayed in the NAV pane.
![]() Click the highlighted STR waypoint symbol.
Click the highlighted STR waypoint symbol.
N-Tracking lists both the Airways that meet at this waypoint and the waypoint itself in the NAV pane. As you saw with Airways, if you click the STR entry, N-Tracking displays more details.
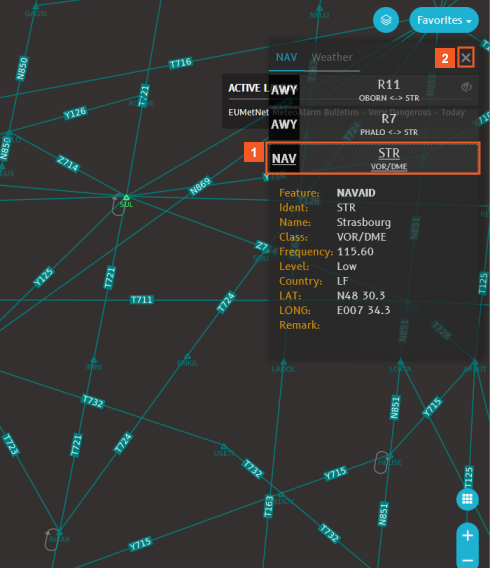
![]() Click STR.
Click STR.
![]() Click the Close (X) button.
Click the Close (X) button.
Holding patterns display as gray loops, with an arrow indicating direction of flight. You can see examples of this near the SUL navaid and the RLAX waypoint.
The holding patterns for a navaid do not change between high and low-level Airways, but they may move slightly.
As you saw with Airways, after you select a holding pattern (or a Navaid), it turns orange to highlight the element you are focused on.
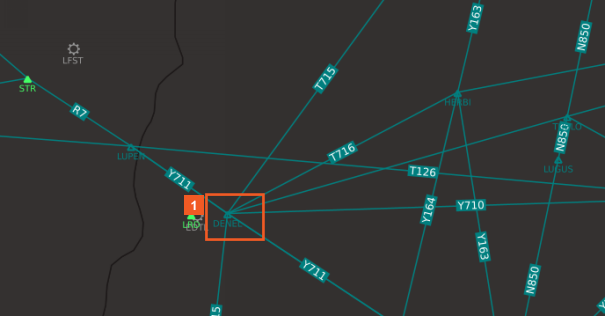
![]() Click the DENEL waypoint symbol.
Click the DENEL waypoint symbol.
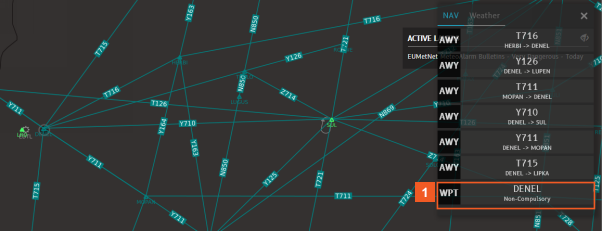
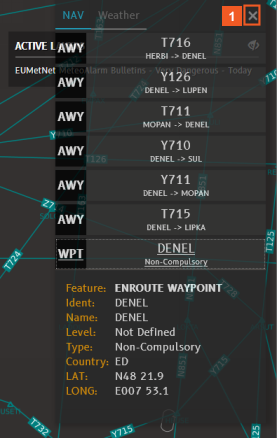
![]() Click the DENEL list item.
Click the DENEL list item.
Six Airways intersect at the DENEL waypoint. Consult the details in the NAV pane to find its exact coordinates.
![]() Click the Close (X) button.
Click the Close (X) button.
You can use the same steps to view similar details for any of the displayed Airways, Navaids, Waypoints, or Holding patterns.
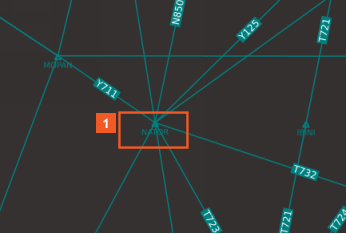
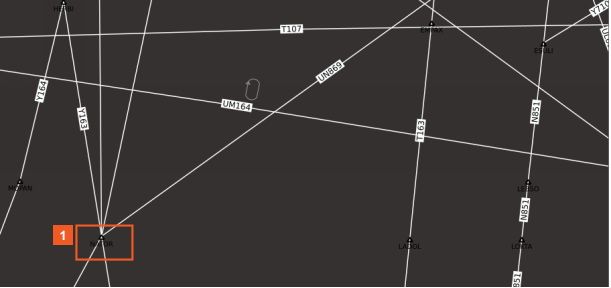
![]() Click the NATOR waypoint.
Click the NATOR waypoint.
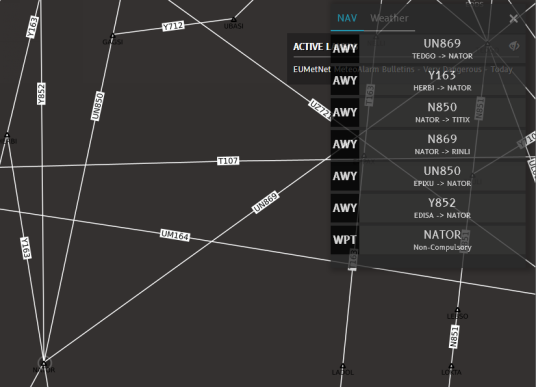
Seven low-level Airways intersect at the NATOR waypoint.
Next, examine the same area and look at high-level Airways, Waypoints, and Navaids.
![]() Click the Layers button.
Click the Layers button.
![]() Click the NAV Layers tab.
Click the NAV Layers tab.

![]() Click the High button.
Click the High button.
High-level Airways display in white.
Waypoints display in black.
![]() Click the NATOR waypoint.
Click the NATOR waypoint.
One less high-level airway intersects at the NATOR waypoint.
SUCCESS
Congratulations! You have successfully applied different navigational layers to the map and have interpreted the information these layers can provide for your flight tracking and planning tasks.