Introduction
Surface Tracking
In this topic, you learn how to identify aircraft currently on the ground at a selected airport to assess potential congestion and ground delays.
We estimate that this will take 5 minutes to complete.
Surface Tracking and the Airport Surface Map
Surface tracking is an optional feature; it may not be deployed by all users.
Use N-Tracking surface tracking to monitor the level of congestion at most airports or to verify if a particular flight is at its arrival gate.
Colors you assign to your tracked, and "other" aircraft help you visualize which airlines are using an airport at any given time. Pre-departure positions received on the ground at the departure airport are seamlessly fused with the enroute positions. As a result, the flight position trail includes “gate-to-gate” positions, including pre-departure (taxi and take-off), along with landing and taxi-in.
Flights remain on the surface map for 15 minutes after their last position report and display tail registration numbers. This makes it easier for Ground Control/Dispatch to identify which gate the plane is assigned and to analyze the movement of planes on runways and around the gates.
In this topic, you learn how to open an airport map in three different ways:
- from the Flight Details pane (for a specific flight)
- from the Airport tab (for a specific airport)
- by zooming in to 2nm or lower on the main map.
You also learn how to view city pair (departure and arrival airport) and other flight information for the aircraft depicted on the airport map.
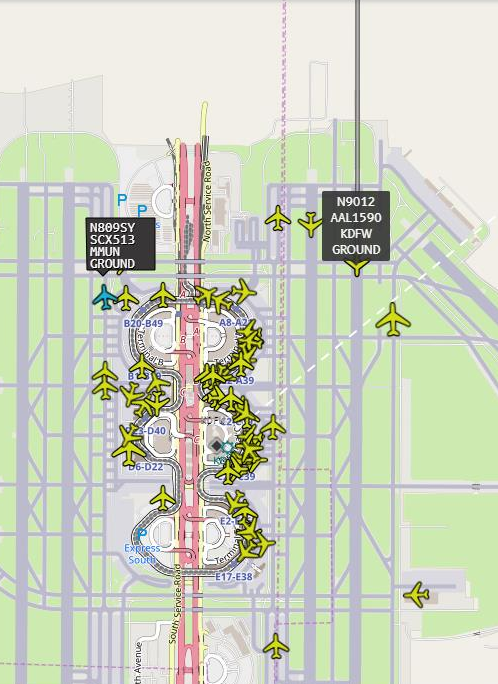
Flight Trail Visibility for Landing Aircraft
For "just landing" flights, enhancing the contrast between the flight trail and the gray runway surface improves trail visibility.
This image to the right shows the flight trail of "just landed" flight AAL1590. The black outline added to the flight trail of the aircraft in the OTHERS category improves contrast for better visibility.
- Detailed Explanation
For this first example, access an airport map from within the Flight Details pane for a specific flight.
In a later example, you'll learn how to use the map with the same techniques, but accessing that map from the Airport tab.
Based on the colors used in the Flight List, tracked aircraft display in blue. While the OTHERS section of the Flight list is not shown here, for this airline, non-fleet aircraft display in gray.
These same colors depict aircraft on the airport map.
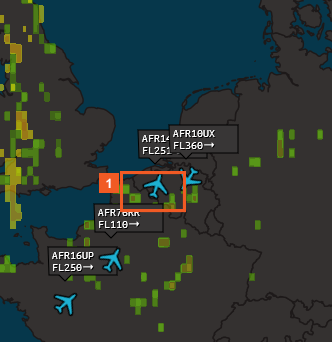
AFR14AR is enroute for the Amsterdam airport (EHAM). Let's see how congested that airport is.
![]() Click the AFR14R aircraft icon.
Click the AFR14R aircraft icon.
HINT
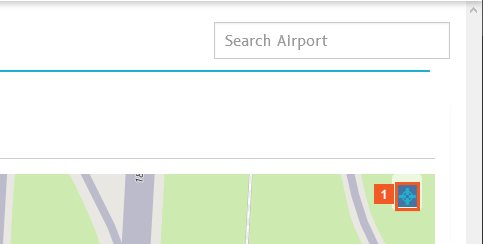
While the Surface Map icon causes the airport map for the selected airport to display, you can click either of the city pair (departure and arrival airport) codes to navigate to the Airport tab for that airport.
For more details on the information available on the Airport tab, consult the topic, Search for airports.
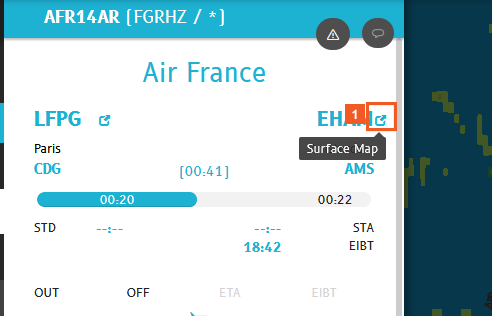
![]() Click the Surface map button.
Click the Surface map button.
Click the respective Surface Map icon ![]() to view airport maps for either the departure or the arrival airport from the Flight Details pane.
to view airport maps for either the departure or the arrival airport from the Flight Details pane.
For this example, use the arrival airport, EHAM(Amsterdam).
In this example, you no longer see the underlying N-Tracking map, but it remains active -- in exactly the same state it was when this new browser window containing the airport map opened.
The new browser window may open less than full screen, on top of the main window. In that case, simply maximize the new browser window while you work with the airport map.
In your operational environment, you do not lose connection with the main map.
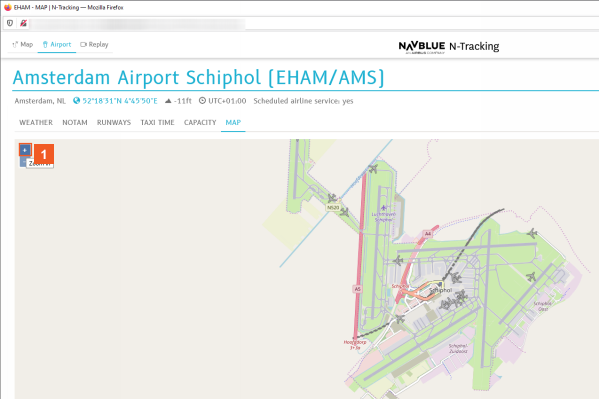
On the airport map, the zoom controls appear in the upper left corner.
By default, when you first access a map, you are at maximum zoom. You can zoom in for further detail, but you cannot zoom out at this point.
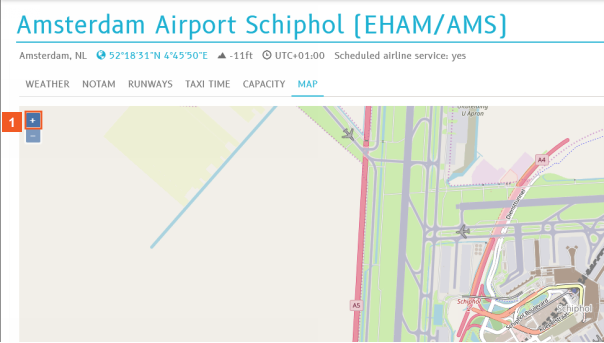
To pan (either within the boundaries of the airport or to see features outside of the airport boundaries), click on the map, and drag to the desired position.
![]() Click the Zoom in (+) button.
Click the Zoom in (+) button.
With the map positioned around the appropriate terminal (if there is more than one), zoom in far enough to see the gate labels.
![]() Click the Zoom in (+) button.
Click the Zoom in (+) button.
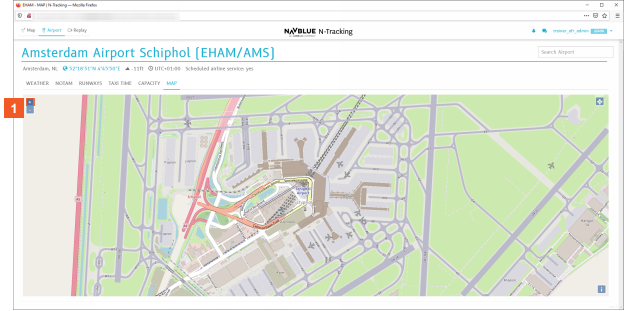
![]() Click the Zoom in (+) button.
Click the Zoom in (+) button.
When you zoom in, you can see individual aircraft locations on the ground more clearly. With gate labels displaying, you can see relative surface traffic around all gates and which aircraft is at which gate.
Click + as many times as needed to achieve the focus you want.
Click - to zoom out again, if you go too far.
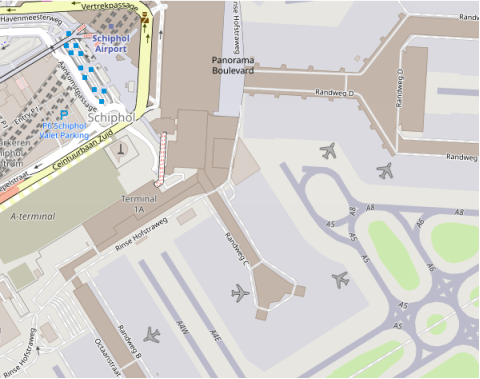
All the depicted aircraft are gray. The colors used to depict aircraft match those on the Flight List. In this example, these flights do not belong to the TRACKED category, but to the OTHERS category.
![]() Click the Zoom in (+) button.
Click the Zoom in (+) button.
Click the icon of the aircraft near Randweg B. You can see that it is between gate B15 and B23.
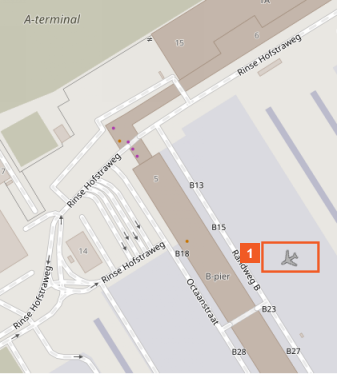
![]() Click the aircraft icon.
Click the aircraft icon.
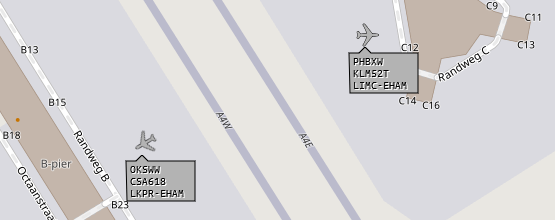
The aircraft label displays the aircraft registration number, flight number and city pair (departure and arrival airport).
Click the aircraft approaching gate C12.
![]() Click the aircraft icon.
Click the aircraft icon.
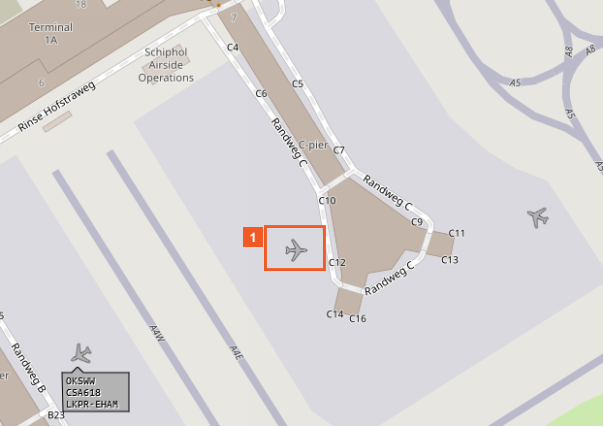
Registration numbers continue to display until you deactivate them by clicking the aircraft icon again or until 15 minutes after the aircraft's last position report.
You can display registration numbers for all aircraft, regardless of whether or not they are part of your fleet.
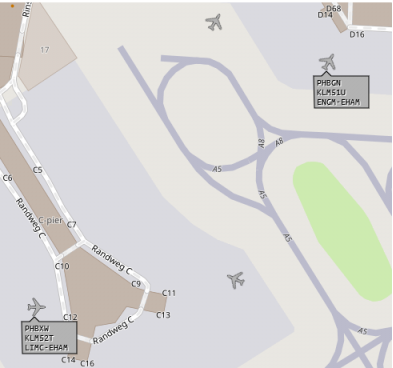
Next, click the icon of the aircraft near Randweg D, gate D16.
![]() Click the aircraft icon.
Click the aircraft icon.
HINT
When the aircraft stops sending position messages after landing, city pair information no longer displays. In all cases, the display of departure and arrival airport information depends on the information contained in the flight plan feed.
Optionally, you can zoom out to see more of the traffic and congestion situation at this airport.
![]() Click the Zoom out (−) button.
Click the Zoom out (−) button.
Optionally, to center the map, returning it to its original position and zoom level, click the Center map button ![]() in the upper right corner of the map.
in the upper right corner of the map.
![]() Click the Center map button.
Click the Center map button.
Next, explore the second method for accessing the surface map -- from the Airport tab.
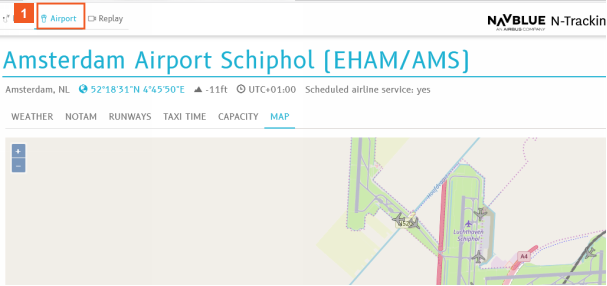
![]() Click the Airport tab.
Click the Airport tab.
If the airport you want to investigate is in your list of airports, click its entry. Otherwise, enter the IATA code in the Search Airport field.
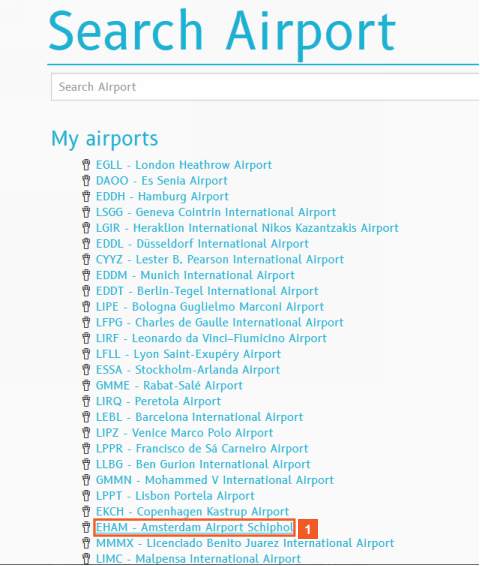
Approaching surface tracking from this point, your first step is to search for the appropriate airport or select it from My airports.
![]() Click the EHAM - Amsterdam Airport Schiphol list item.
Click the EHAM - Amsterdam Airport Schiphol list item.
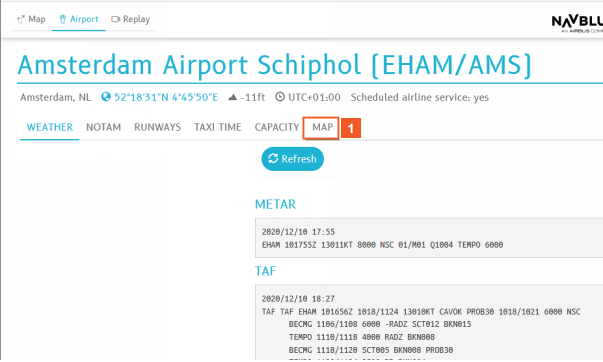
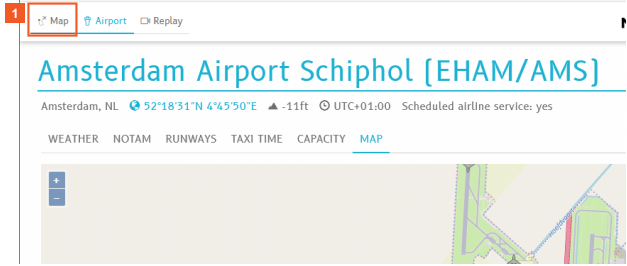
Weather information for the airport displays first. Access the airport map from the MAP tab.
![]() Click the MAP tab.
Click the MAP tab.
From this point, surface tracking works exactly as you just learned.
Click the MAP tab (beside the Airport tab) to display the main map again.
![]() Click the MAP tab.
Click the MAP tab.
ATTENTION
For the following function to work, you must have the Display Airport Surface Map option (User Settings > Map) selected.
For more details, review the topic, Display Airport Map (for Surface Tracking Users Only) in the User Settings section.
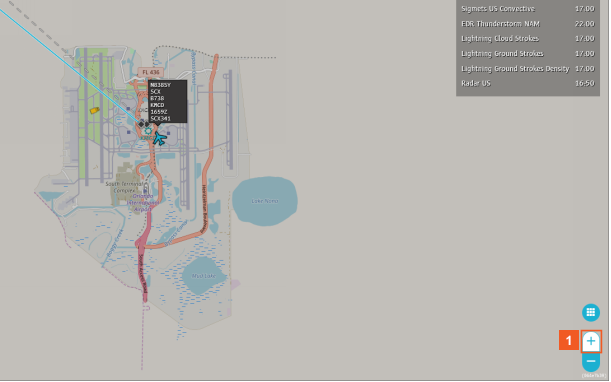
In this next example, flight SCX341 is flying into airport KMCO and as a Dispatcher, you want to see what level of congestion exists on the ground.
You are currently at a zoom level of 20 nm.
The airport surface map displays at a zoom level of
2 nm or lower, so zoom in at least that far.
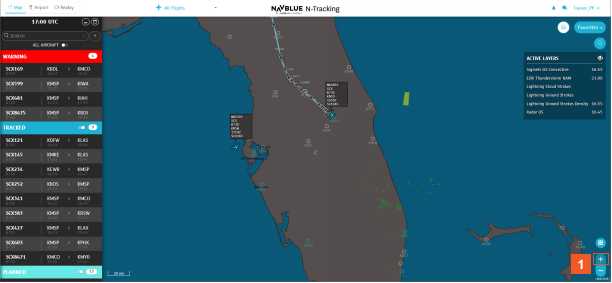
![]() Click the Zoom in (+) button.
Click the Zoom in (+) button.
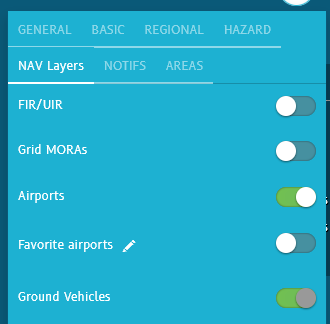
If you want to also see ground vehicles on the airport surface map, there is one other key setting: Ground Vehicles on the NAV layer.
At the current zoom level, the option is active, but disabled.
This option is automatically enabled at a zoom level of 2nm, but if you want to remove ground vehicles from the surface display, disable the option in the NAV layer.
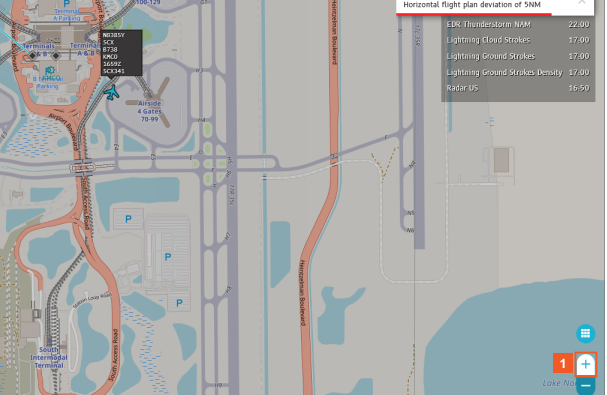
In this example, you are at a zoom level of 2nm.
For this airport, zoom in even farther to see ground activity better.
![]() Click the Zoom in (+) button.
Click the Zoom in (+) button.
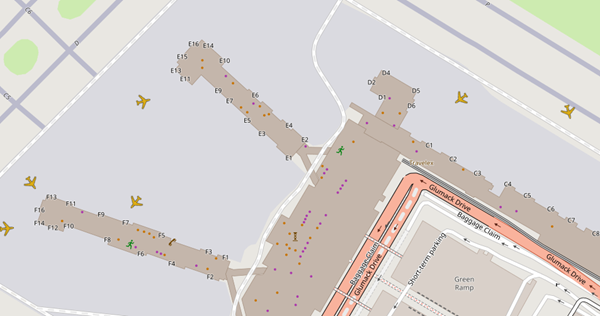
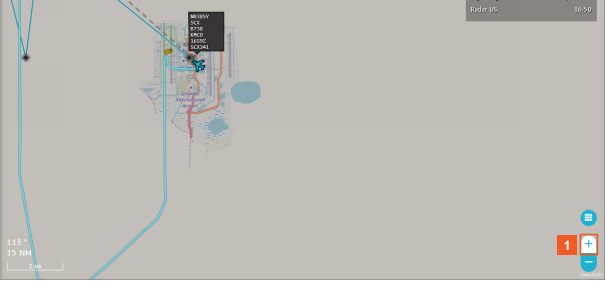
At a zoom of 1nm, the location of ground vehicles (shown in yellow) becomes clearer.
![]() Click the Zoom in (+) button.
Click the Zoom in (+) button.
Ground vehicles (snowplows and cargo carriers) display on the surface map.
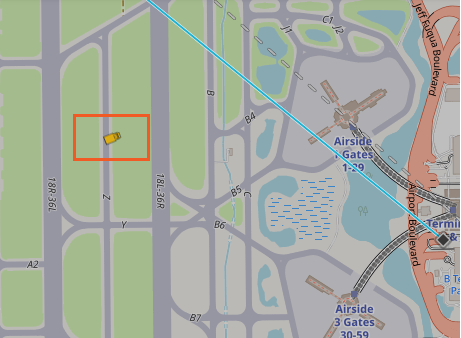
Flight SCX341 is traveling towards its ramp.
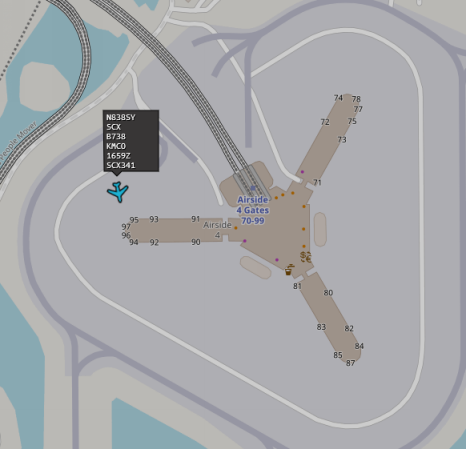
![]() Click the Zoom in (+) button.
Click the Zoom in (+) button.
At a zoom level of .05 nm, it is very clear that there is no congestion around the ramps for gates 70-99. Disembarking should flow seamlessly.
SUCCESS
Congratulations! You have viewed airport surface information in various ways and learned to distinguish ground vehicles from aircraft on the map.
Note: Ground vehicles include snowplows and cargo vehicles.
With better awareness of activity on the ground, you can assess traffic at airport gates and better advise ground personnel or flight crew.